Mac & VSCode 개발 환경에서 Golang 설치 ~ Echo로 hello world 까지
0. 목적
mac환경에 go를 설치해서, echo로 웹 페이지를 띄워봅시다. 참, IDE는 VSCode를 사용합니다.
1. Go 개발환경 구축
1-1. go 인스톨
$ brew install go
문제 없으면 아래와 같이 처리내용이 표시됩니다.
==> Downloading https://homebrew.bintray.com/bottles/go-1.14.5.mojave.bottle.tar
==> Downloading from https://d29vzk4ow07wi7.cloudfront.net/d653d2c8faf8b8c0e2152
######################################################################## 100.0%
==> Pouring go-1.14.5.mojave.bottle.tar.gz
🍺  /usr/local/Cellar/go/1.14.5: 9,443 files, 424.7MB
1-2. go가 제대로 설치 되었는지 확인
$ go
Go is a tool for managing Go source code.

Usage:

	go <command> [arguments]

The commands are:
-- 이하 커맨드 설정
$ go version
go version go1.14.5 darwin/amd64
1-3. 설치가 되었으면 Hello world!
$ mkdir -p $HOME/go/src/hello
adminui-MacBook-Pro:go admin$ cd $HOME/go/src/hello
adminui-MacBook-Pro:hello admin$ cat << EOF > hello.go
> package main
> import "fmt"
> func main() {
>     fmt.Printf("hello, world\n")
> }
> EOF
adminui-MacBook-Pro:hello admin$ go build
adminui-MacBook-Pro:hello admin$ ./hello
hello, world
문제없어 보입니다.
1-4. VSCode의 go 확장기능 설치

- Extensions에서 Go for Visual Studio Code 를 검색해서 설치합니다.
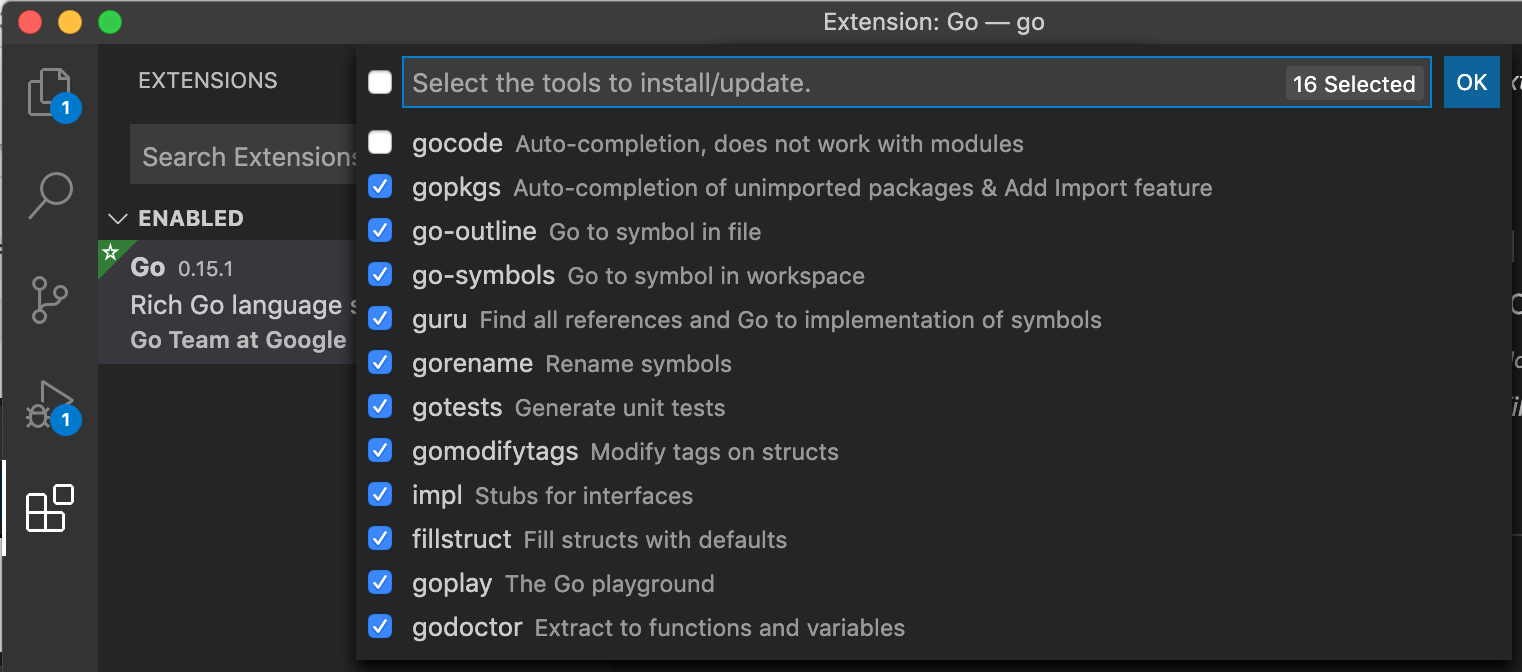
- Command Palette에서 Go:Install/Update Tools을 선택해서
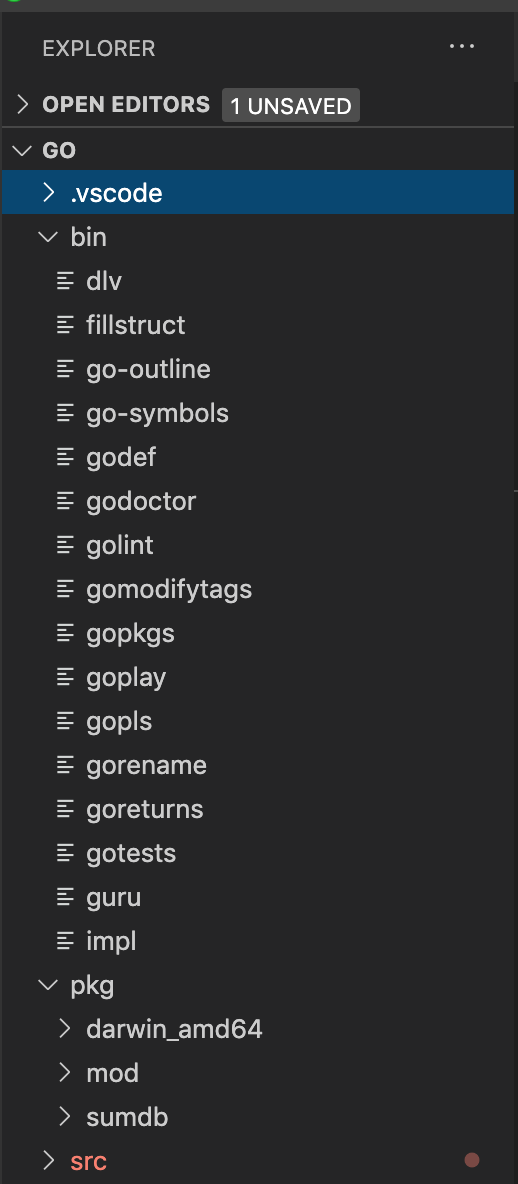
gocode과gocode-modules만 빼고 다 선택해서 ok를 클릭합니다. 참고사이트를 보니 선택에서 제외한 모듈은go.mod의 영향으로 동작이 불안정한 경우가 있다고 하여 해당 사이트 설명대로gopls를 추가로 설치할 예정입니다.
1-5. gopls 추가
- 참고 : gopls - User guide
go get 커맨드를 사용해서 gopls를 추가합니다.
$ go get golang.org/x/tools/gopls@latest
go: downloading golang.org/x/tools/gopls v0.4.3
go: golang.org/x/tools/gopls latest => v0.4.3
go: downloading golang.org/x/tools v0.0.0-20200708181441-6004c8539734
go: downloading mvdan.cc/xurls/v2 v2.2.0
go: downloading honnef.co/go/tools v0.0.1-2020.1.4
go: downloading github.com/sergi/go-diff v1.1.0
go: downloading golang.org/x/sync v0.0.0-20190911185100-cd5d95a43a6e
go: downloading github.com/BurntSushi/toml v0.3.1
gopls vscode를 참고하여 VSCode의 설정파일을 수정
저의 경우 VSCode도 막 깔은 깨끗한 상태라 현재는 아래 내용을 추가한 상태입니다.
settings.json
{
    "go.useLanguageServer": true,
    "[go]": {
        "editor.formatOnSave": true,
        "editor.codeActionsOnSave": {
            "source.organizeImports": true,
        },
        // Optional: Disable snippets, as they conflict with completion ranking.
        "editor.snippetSuggestions": "none",
    },
    "[go.mod]": {
        "editor.formatOnSave": true,
        "editor.codeActionsOnSave": {
            "source.organizeImports": true,
        },
    },
    "gopls": {
         // Add parameter placeholders when completing a function.
        "usePlaceholders": true,

        // If true, enable additional analyses with staticcheck.
        // Warning: This will significantly increase memory usage.
        "staticcheck": false,
    }
}

여기까지 go로 개발 준비 완료!
2. echo 도입
echo 설치
go get -u github.com/labstack/echo/...
main.go 작성
main.go
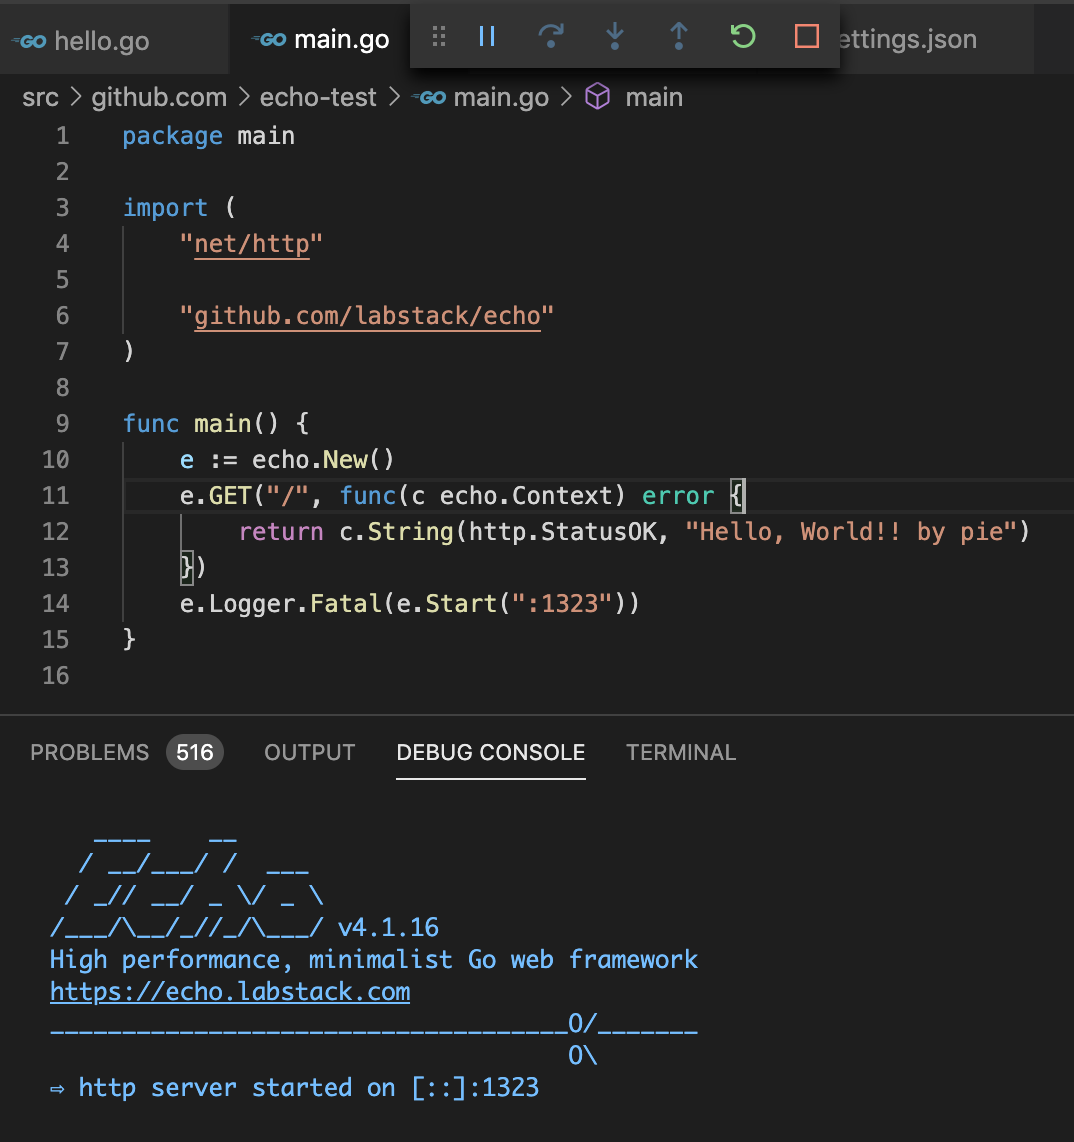
$HOME/go/src/github.com/echo-test 경로에 main.go 파일을 작성합니다.
package main

import (
	"net/http"

	"github.com/labstack/echo"
)

func main() {
	e := echo.New()
	e.GET("/", func(c echo.Context) error {
		return c.String(http.StatusOK, "Hello, World!! by pie")
	})
	e.Logger.Fatal(e.Start(":1323"))
}
main.go 파일을 빌드한 다음에 터미널에서 go run 커맨드를 입력하거나 VSCode에서 Run 메뉴를 사용해서 실행합니다.

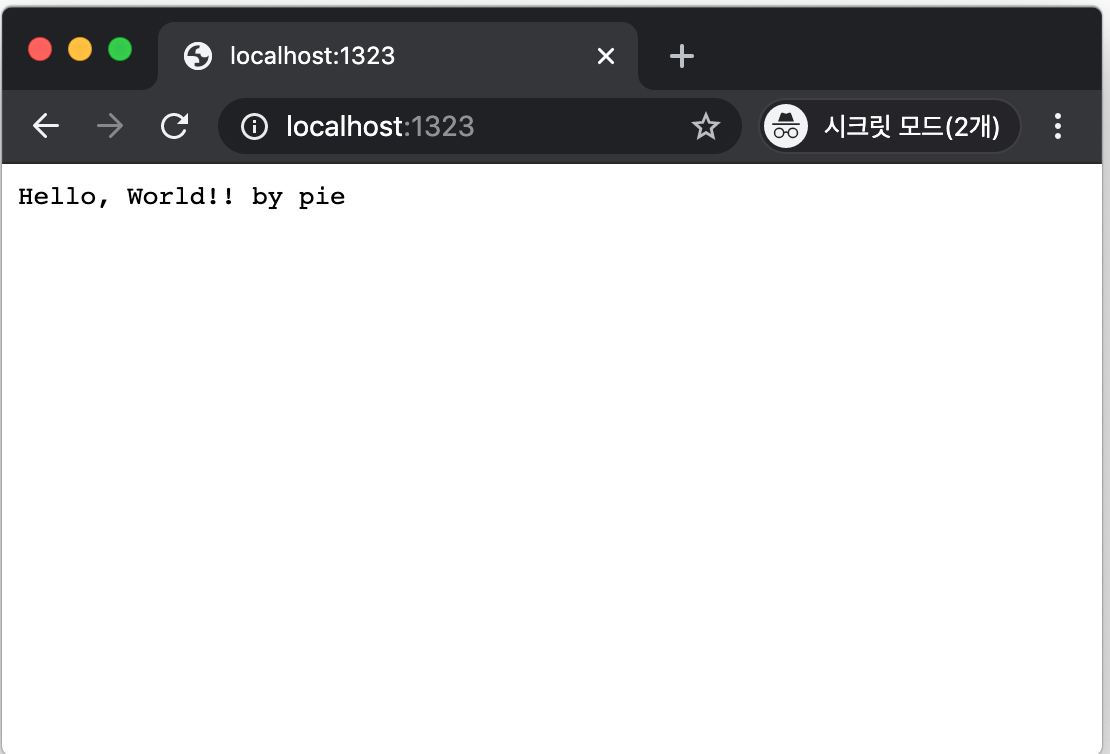
http://localhost:1323/ 로 접속해서 아래와 같이 표시되면 우선 기동은 성공!

참고 사이트
- Go in Visual Studio Code
- Go勉強(1) mac+VSCode+Go環境を設定
- 【第4回】Go言語(Golang)入門~REST API環境構築編~
- echo : guide
- golang echo 超入門
- Go/echo 入門
- (随時更新) VSCodeの各種設定ファイルの格納場所備忘録メモ
3. 환경변수 설정
GOPATH와 GOROOT를 설정합니다.
매번 잊을만하면 설정하고 잊을만하면 설정하는지라 메모….
$ nano .bash_profile
export GOPATH=$HOME/go
export GOROOT=/usr/local/opt/go/libexec
export PATH=$PATH:$GOPATH/bin
export PATH=$PATH:$GOROOT/bin
내용 수정 -> Ctrl+O(WriteOut) -> Enter -> “Wrote ** lines” 표시 -> Ctrl+X(Exit)
설정이 끝나면 터미널을 다시 열고 아래와 같이 확인합니다.
$ echo $HOME
/Users/admin
$ echo $PATH
/usr/local/bin:/usr/bin:/bin:/usr/sbin:/sbin:/usr/local/go/bin:/Users/admin/go/bin:/usr/local/opt/go/libexec/bin
$ echo $GOPATH
/Users/admin/go
$ echo $GOROOT
/usr/local/opt/go/libexec
설정 완료~~
참고 사이트
- Install go with brew, and running the gotour
- MY MAC OSX BASH PROFILE
- How to save and exit “nano .bash_profile” in Terminal?
- how to save to bash_profile using nano editor